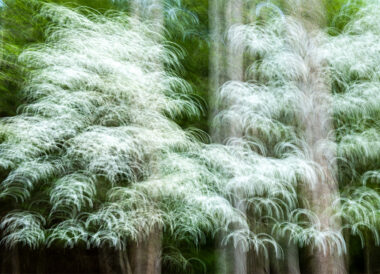
Photographers love acronyms…ACR, DNG, RAW, NEF, IBIS,VR…and ICM. I sometimes find myself teaching a class on workshops speaking in code! What will be the new acronym for 2024? ICM, or intentional camera movement, is a fun, creative camera technique. Moving the camera during exposure transforms the image from everyday to unique. Recently I’ve heard from Read More
Blog
Best new editing tool in 2023
There have been monumental changes to Photoshop and Lightroom this year. I was just looking back at online classes we did four years ago on selections, and now with the new masking features in Photoshop those classes are obsolete! Masking has been a hit, and changed the way we make selections and edits on specific Read More

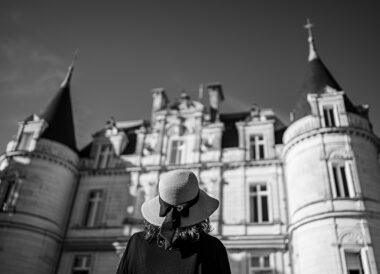
Creativity lessons: No expectations
I have been reading The Creative Act: A Way of Being by Rick Rubin. This books explores creativity in all forms of art. The book has some very though provoking ideas, and also reassurances that all artists like to hear. I really enjoyed the concepts about just opening yourself to creative energy, not being so Read More

VSGO air blower/camera cleaning
I spend a lot of time cleaning cameras. Trips to Africa and Alaska can really load on the dirt, dust and debris. Recently I just returned from White Sands NP, and I noticed many of my lenses had sand on them, as well as my camera bodies. Time for a camera cleaning. I used to Read More

Manual Mode versus Auto ISO Manual Mode
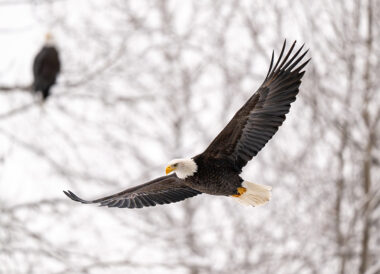
We were recently in Haines, Alaska photographing bald eagles on the Chilkat Bald Eagle Reserve. As expected it was a magical experience, with lots of birds and varied weather. Sun, snow, rain, fog…we saw it all this year. A major question for our workshop groups was what mode to use when shooting eagles. For all Read More
Variable/Flexible ISO
I recently spent two weeks in Haines, Alaska teaching eagle photography workshops. This is my favorite place to photograph eagles, 3000 birds along the Chilkat River feeding on a late season salmon run. And the backdrop snowy peaks are stunning, I honestly could just shoot landscapes along the Haines river with or without eagles, beautiful Read More
2023 Holiday Gift Guide
It’s that time of the year again! Ready to hit the ‘buy now’ button? Cree and I are going to host another online gift guide version as well, contact cree (creetbp@gmail.com) to be added to the list. We have seen a lot of things in the field this last year, gear that worked and made Read More
Einchrom Five Strobe
Elinchrom has been releasing a number of new lights recently, introducing their line of battery Monolights. Battery mononlights are self-contained flashes, meaning no cables or separate battery pack, everything is in the head (or attached). Elinchrom has three versions..the One, Three and Five. The One has 131Ws power at 3.3 pounds, the Three has 261Ws Read More

Nikon 135mm F1.8 Plena
Nikon is really doing some amazing things right now. They have been introducing new lenses left and right; innovative designs, lightweight solutions, and incredible autofocus. I can’t imagine shooting wildlife now without my 600mm F4 with built in 1.4x. I flipped that converter on and off so much in Africa my finger got sore, and Read More

Photographing eagles at Chilkat Bald Eagle Preserve
Almost thirty years ago a friend and I decided to roadtrip to Haines, Alaska. I was living in Alaska at the time, living the dream of being in the high north photographing Denali climbers, northern lights and incredible wildlife. We loaded up my beat up old Toyota truck, drove through the Yukon at -20F being Read More
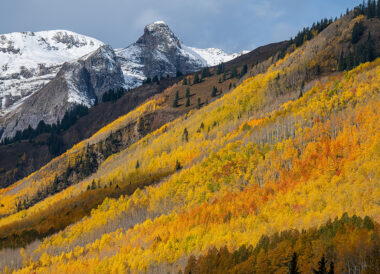
Fall Impressions Nikon
I hope everyone is getting some great autumn photography right now. The mountains in Colorado are going past peak, but the lower elevations still have great color. Interested in some tips for creating stunning fall images? Nikon just published another article I did for them titled Fall Impressions. This story gives tips and techniques to Read More
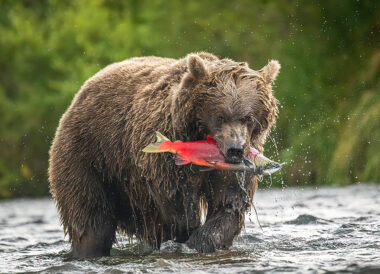
Bear Essentials for Nikon
Nikon just posted an article I did for them on bear photography. Titled “The Bear Essentials“, this story provides tips and techniques for bear photography. Writing the story and working on images was like going back in time for me. My first photo workshops were guiding bear trips to Kodiak and Katmai over 25 years Read More