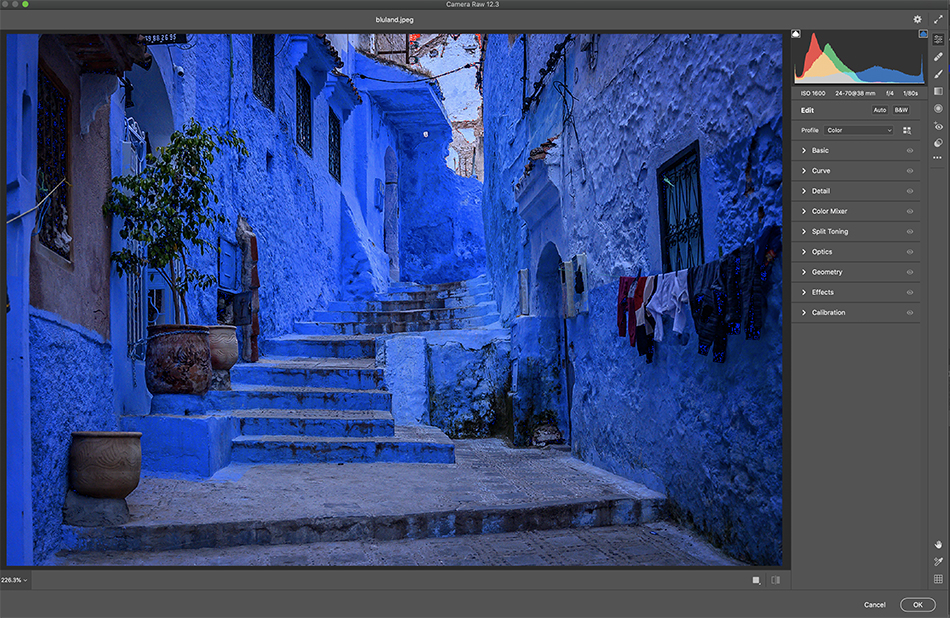
Okay, the moment you have been waiting for…Camera Raw has been transformed. As in it looks completely different. Here is the good news, the new interface looks similar to Lightroom…finally! Many folks we see on workshops are reluctant to edit in Photoshop, and it started with the RAW window looking very different from Lightroom. Now Camera Raw has all the tools and panels on the right side, so it feels very similar to Lightroom.

Similar to the Lightroom Update, a Hue color slider is available in the basic panel when you make a seletion using the radial and graduated filter as well as the adjustment brush. Curves adjustment also has the same color channel new layout. If you are looking for those familiar tools, they are pinned on the extreme right side. They feel a little obscure so far to the right. But just remember this, when you can’t find a tool or adjustment, it is somewhere on the right side of the window. And when you can’t seem to find your way back to the basic panel, just hit the icon in the upper right corner of the window. This sends you right back to the home screen…I kept getting lost when I was doing adjustment brush edits. The HSL panel has a new look and a color only mode, which will be nice. And you will find a few more presets as well.
I have to admit initially I really didn’t like the new look, but that came from me being so familiar with the old screen. After working with the new interface for a few days, and jumping back and forth in Lightroom, things feel a lot more intuitive between the programs. Jump in to Camera Raw and check out the new look!