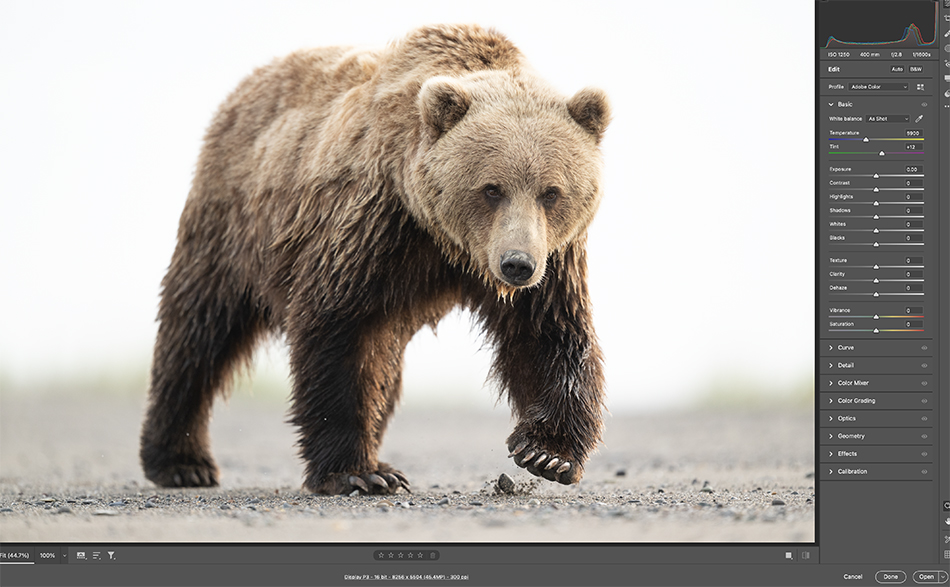
I have gotten a lot of questions about high key editing so I thought I would go through my workflow here. I’ll be heading to Africa later this month, and high key editing can help wildlife images in poor or high contrast light. There are a lot of ways to do a high key edit, so modify these steps to best fit your desired outcome.
First, a few things about high key. This look works well with backlit subjects on clean or very out of focus backgrounds. High key can also work well with subjects against blue skies and high contrast light. When I see a good high key situation in the field, I will bracket my exposure and overexposure the image one, two or even three stops. Overexposing in the field will reduce the amount of slider adjustments you need to do later, but remember if you blow out the exposure in the field you won’t be able to recover those highlights later. So if you can try to bracket a few images so you have both a good exposure and an overexposed shot.
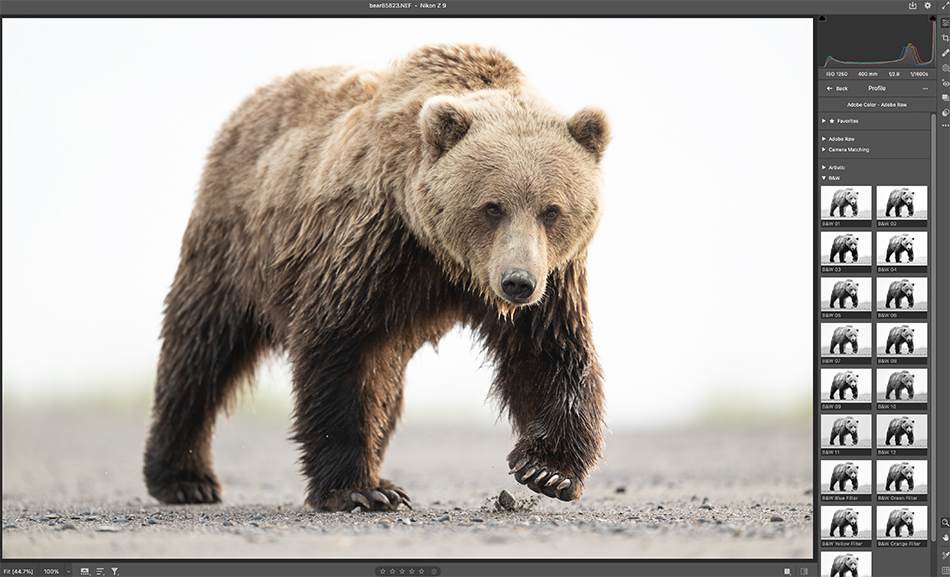
One very important thing with a high key image it to use as low of ISO as you can. You will be making some aggressive slider pulls and edits in post production, which is only going to increase noise in your image. If you start with an ISO 2000 shot, your results are going to look really noisy. Also, you really want the background out of focus or a gray sky. Hippos on the water, bears on the mudflats, birds against a gray sky…you get the idea.
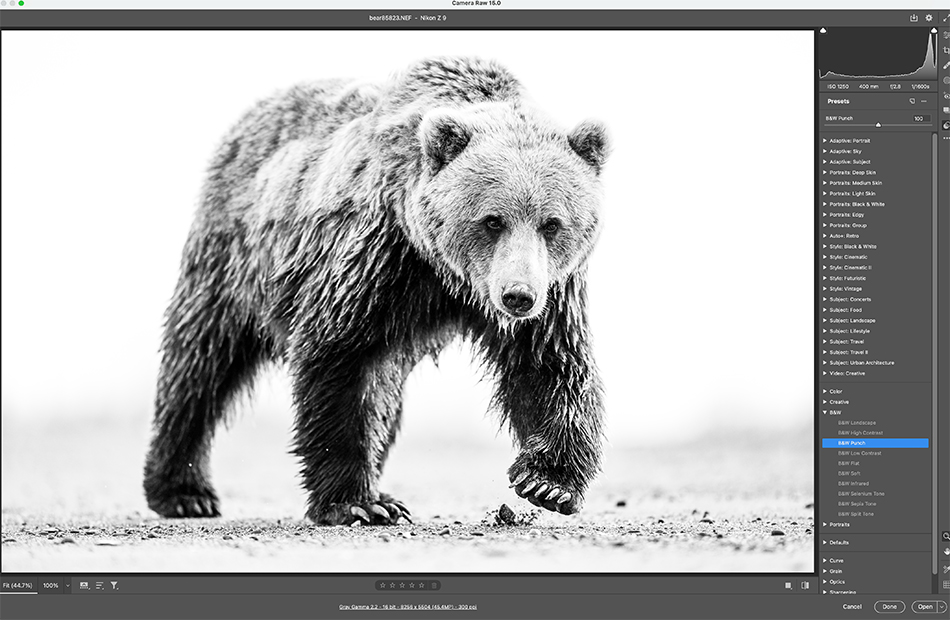
Step One: Open the image in PS or LR, and I start by converting to BW. I like BW for my high key images, you are editing that direction, and BW just makes things cleaner and nicer. To convert you have two choices; use a profile, or use a preset. Profiles don’t move sliders, they give you a starting baseline effect with full slider control. Presets do move sliders, but also do much the same you will get using a profile. Roll your cursor over the effects to see what you like. For profiles I like the B&W 1 and B&W 8, and for presets I like ‘Landscape’. Make your choice and convert to BW.
Step Two: I normally start by increasing exposure a little. Next I set the White and Black Point. You can do this visually, or hold the Alt/Opt Key down. Holding the option key down while moving the white slider to the right will show you where the whites are blown out (via color)…important here is not to overexpose parts of your subject. Do the same with the black point; when you see color in the dark areas stop moving the slider. You want to loose most detail in the background except on the animal. If the edges of your animal get too blow out, you can recover them later in the workflow.
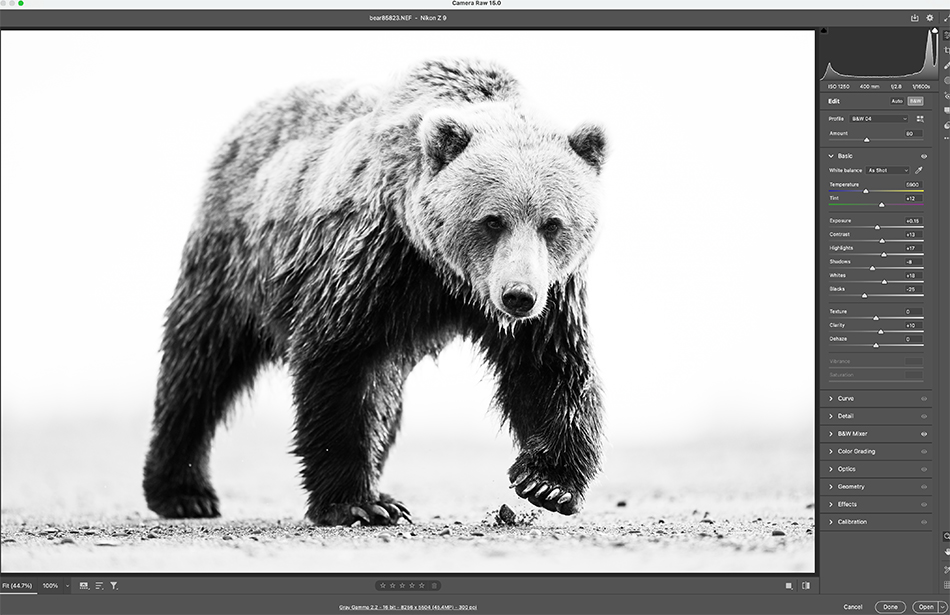
Step Three: Now I will go to Highlights and increase them (to the right), and maybe move Shadows to the left just a little. The idea here is you are trying to continue to increase contrast, not open up shadows just yet.
Step Four: I will increase contrast a little using the contrast slider. You can also use the curves tool and reset the white/black point curve as another way of doing high key edits. Lots of ways to do things.
Step Five: Now I will start to use the new masking features. For this bear I will select subject, then increase clarity and texture to improve fur contrast.
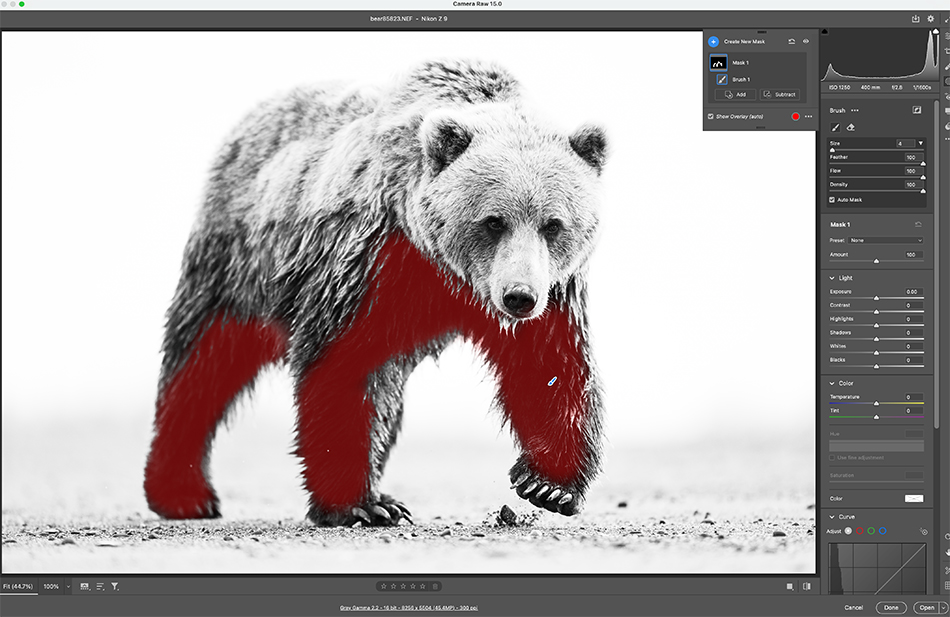
Step Six: Next I will use a mask, choose Brush, and select the dark areas of the bear on the underside. Once selected I will open these up using exposure and highlights. I want contrast but I don’t want inked up blacks with no detail in large areas of the image.
Step Seven: The final step was using a mask, choosing a Brush, and selecting the bears head. Once selected I added more texture and clarity to improve the contrast of the bear’s fur. If needed you can also use a mask/brush, select the eyes, and brighten them slightly.
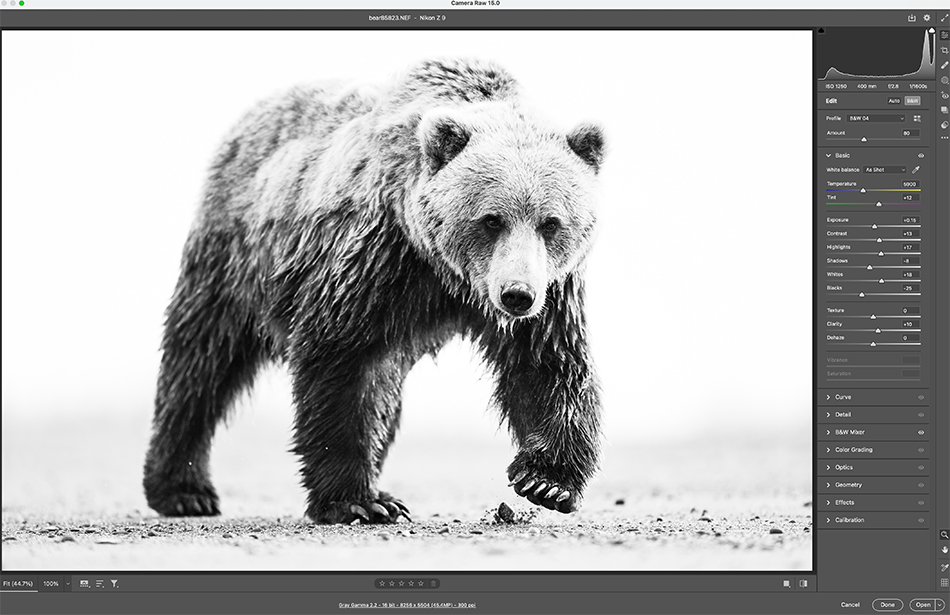
High Key editing is a great way to create an image when conditions may not be great for a clean shot. Just increase the exposure, convert to BW, do a few adjustments mentioned above, and you should be ready to go.