Costa Rica
While you can probably do most of your editing in Lightroom, there are some things you just can’t do in Lightroom. Probably the biggest reason many people shift into Photoshop while editing in Lightroom is to correct or erase objects. Content Aware Fill gives you a lot more control and better results for removing complex objects. And since most photographers get Photoshop with their Adobe Lightroom subscription, why not jump over and use a few tools? We’re teaching some Photoshop techniques on workshops like using Content Aware Fill…you don’t have to master Photoshop to use a few simple tools. Workshop participants love it!
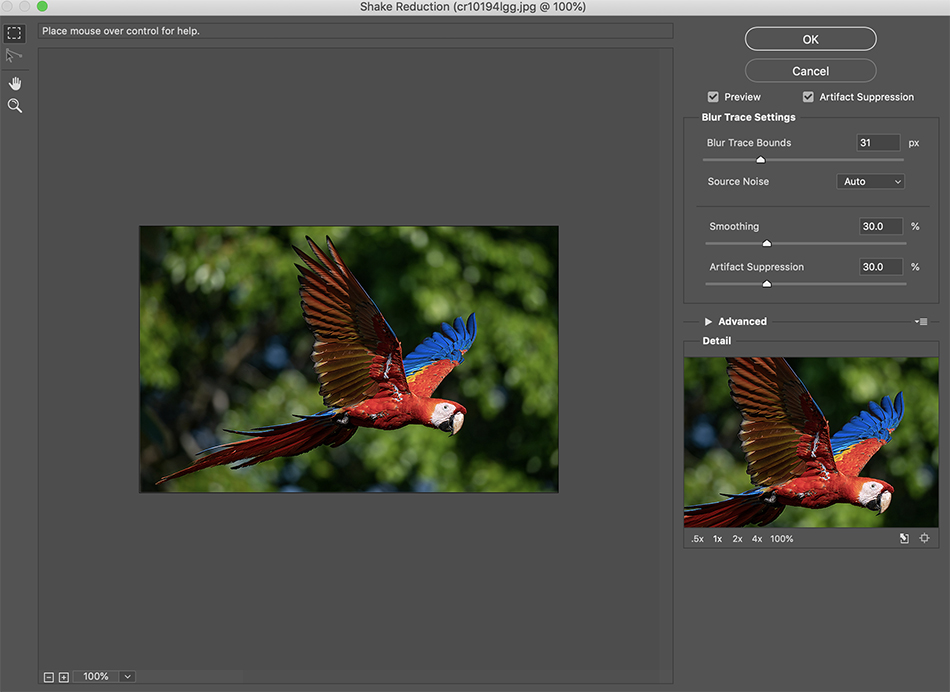
Here is another useful filter in Photoshop, and Lightroom does not offer it; the Shake Reduction Filter. Just like the name implies, this filter can help salvage some images that are blurry due to camera shake (i.e. you weren’t using a fast enough shutter speed for your shot). To find this filter, in the menu go to Filter-Sharpen-Shake Reduction. Here is the good news. The default settings work great on many images. This filter isn’t sharpening the image, but more like rebuilding the pixels to be sharp.

A powerful part of this filter is the loupe view on the right side. This view allows you to see the effect at 100% or larger. But what is really important in the loupe view is the small circle icon called the Enhance At Loupe Location. This icon appears when you click inside the loupe and move the image to the blurry area. Once you have found where you want to fix the shake, for example a bird’s head in flight, click on the Enhance filter and it will reconstruct the image. You might be shocked…this filter can really fix slightly blurry images that sharpening couldn’t help. There are three sliders above the loupe. The Blur Trace Bounds slider will increase the effect if you drag it to the right, or soften the effect if you drag it left. Next the smoothing slider reduces noise, which also softens the image. If you don’t have a lot of noise, then you don’t need to set this filter to a high value…hold onto the detail in your image. And last the Artifact Suppression slider reduces what the filter creates when trying to sharpen your image. Some images might look pretty bad after you use the filter. Try adjusting the Artifact Suppression Filter to reduce the pixelated look.
The Shake Reduction Filter is especially effective when using long lenses and panning. I just got done editing hundreds of birds in flight from my Costa Rica scouting trip (we just posted it!), and some were blurry because I wasn’t shooting fast enough. I was amazed at how this filter saved the day! This filter is a powerful tool in my workflow, and works great with wildlife and sports images. It also works great with static scenes using slow shutter speeds. Give it a try!